Looking back at old printed photos often brings a mix of tears and joy. However, over time, you might notice their colors have faded—blacks turning to washed gray, whites tinged with yellow, and blue skies bleached. Additionally, sun damage, stains, scratches, and creases obscure the memories captured in these images. So, how can you color correct old photos to restore their original vibrancy? Is it possible without complex software like Photoshop?
The answer is absolutely Yes! Just go to FlexClip, a user-friendly programme for restoring old photos online, offering simple and effective solutions to color correct your images in just seconds. Let’s dive in!
Also Interested in: 1 Minute Solution to Change Color of Image Online with AI>>
Part 1. The Best Photo Color Enhancer Online for You
Not tech-savvy? No photo editing experience? No problem! FlexClip makes photo color correction easy with an AI-powered photo enhancer tool that automatically enhances lightness, saturation, contrast, temperature, and hue in seconds. If you prefer more control, you can manually adjust color using sliders or apply a filter preset with just one click. Excited to start color correcting your old photos? Let’s get to the key points!


Part 2. How to Color Correct Old Photos Using FlexClip
In FlexClip, you have three methods to revive and color correct old photos, restoring cherished memories and rejuvenating long-buried images. In the following section, we’ll introduce each color correction method one by one. Just scan your old photos as digital images and keep reading to learn more!
1)Perform Pro-level Color Correction with AI
FlexClip streamlines the color correction of old photos into a one-click operation with its AI photo enhancer. Trained on millions of photo pairs through deep learning, this AI tool can accurately detect and revitalize faded colors to match the original photo’s vibrant quality. Additionally, you can use AI photo restorer to eliminate stains, tiny scratches, and restore blurred faces. Here’s how to do it.
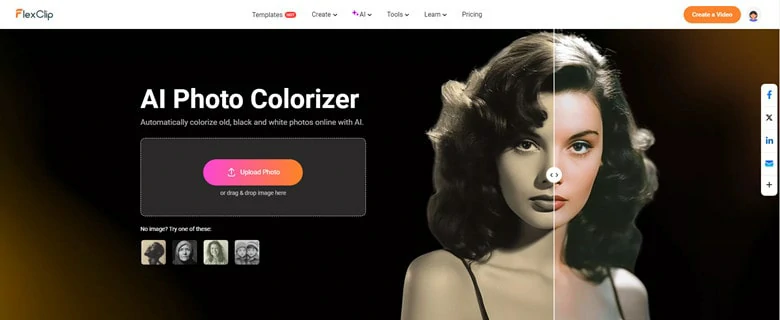
Go to FlexClip's AI Photo Colorizer and Upload Your Old Photos
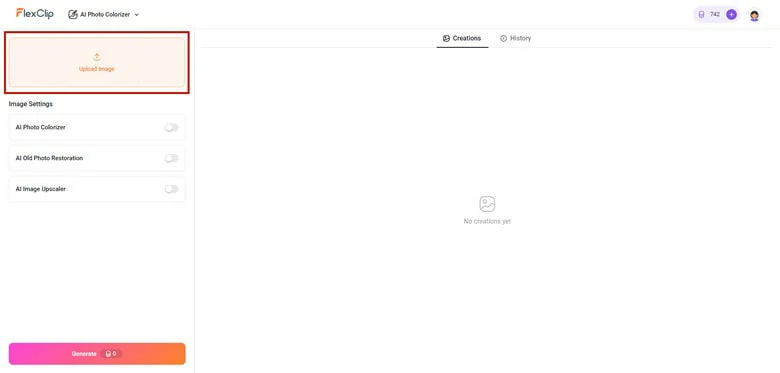
Enable AI Photo Colorizer Feature in FlexClip
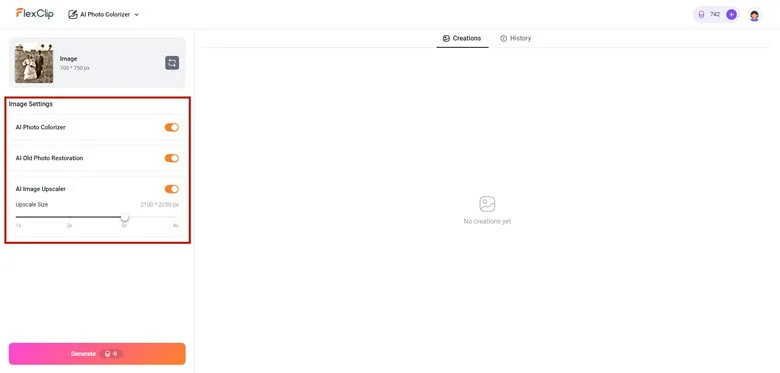
Click on Generate Button to Start the Auto Color Correction Process
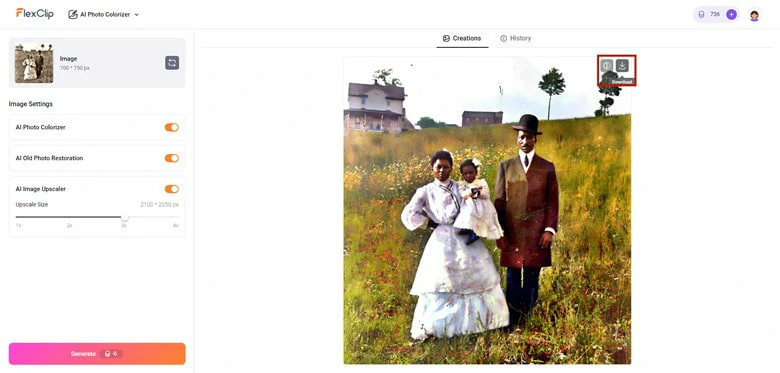
Preview and Download the Color Corrected Picture to the Local File
2)Manually Enhance Photo Color through Parameter Adjustments
For those who prefer complete control over color correction, FlexClip offers an easy way to adjust key parameters that define your photo's color. You can modify exposure, contrast, brightness, temperature, tint, saturation, highlights, shadows, and vintage settings to achieve your desired look. Simply follow the guide below to make your adjustments.
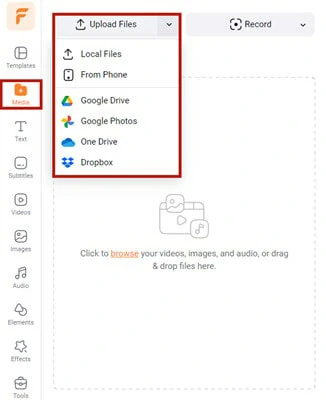
Visit FlexClip Editor Page and Import the Picture You Want to Make Color Correction
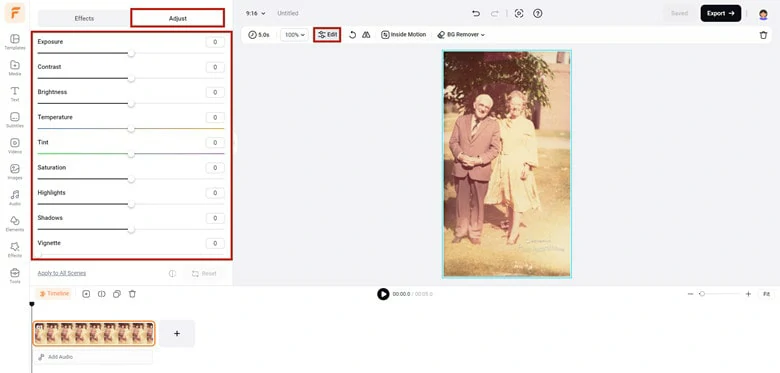
Add Image to Timeline and Access FlexClip's Color Correction Dashboard

Modify the Parameters to Correct Colors of Your Picture
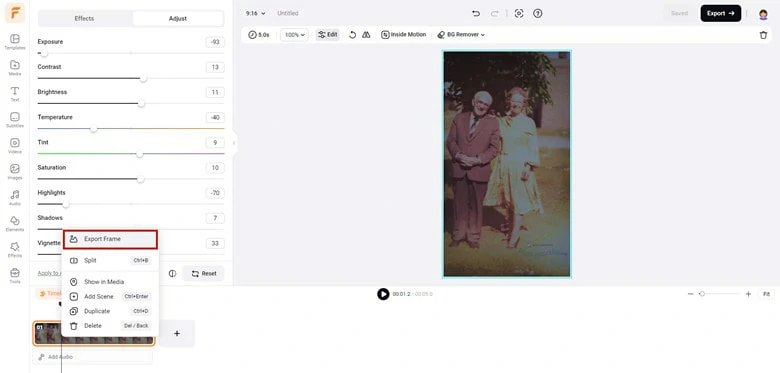
Click on Export Frame to Download the Enhanced Photo
3)Manually Correct Photo Color Using a Filter
To manually color correct old photos, superimposing a stylish filter is a straightforward way to enhance your images. FlexClip offers over 120 filter presets that can instantly modify your photo’s colors. Here’s how to use this effective method:
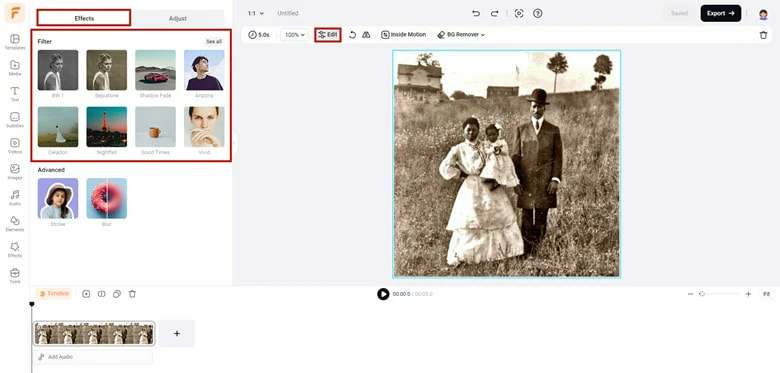
Drag and Drop Image to Timeline and Enable the Filter Feature
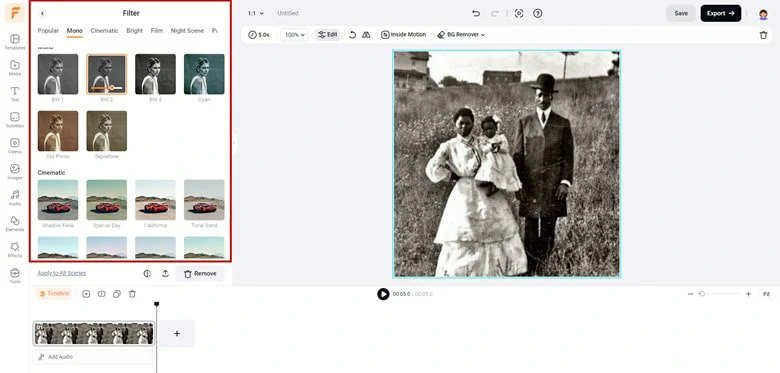
Choose the Desired Filter Effect
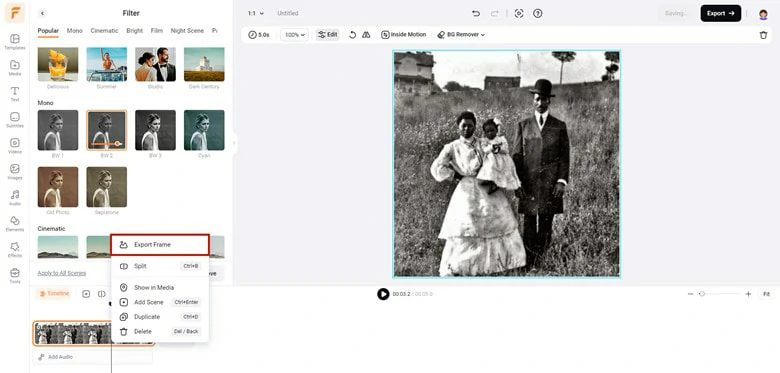
Choose the Export Frame Option to Download Edited Photo
Frequently Asked Questions
1.How to Color Correct Old Photos in Photoshop?
To restore old photos in Photoshop, do as follows:
Step 1: Open your digital photo with Photoshop. Then, click Layer -> Duplicate layer.
Step 2: Erase defects by using various tools to get rid of rips and stains. The Spot Healing Brush works well with smaller defects, while the Clone Stamp conceals bigger flaws on complex backgrounds.
Step 3: Enable the neural filter to automate the colorization process. Make sure your Photoshop version is 2022 or above to successfully find this feature.
Step 4: If the image is colored but dull, use Curves to enhance colors, eliminate color casts, and boost faded hues. Then, choose File > Export > Export As to adjust output settings.
2.How to Color Correct and Restore Old Photos on iPhone?
If you love to do everything with your trusty cell phone, then finding a photo colorizer app is the best way to repair old photos on your mobile device. Here an application called Colorizer is recommended to breathe new life into your old black-and-white photos. It is powered by automatic machine learning and ensures 100% streamlined transformation process with AI touches.
The Bottom Line
hat’s it! We introduced three methods for color correcting old photos without using Photoshop. Choose the one that’s best for you and start your photo modification journey right now!


FlexClip Video Maker
The easiest way to help you create custom videos, no design skills needed.
Start Now for Free
Hot & Trending
-

Ultimate Tik Tok Guide – How to Tik Tok & How to Make a Tik Tok Video that Gets Likes
-

Instagram Story Video Quality Bad After Upload? Fix It!
-

7 Best Ways to Find Music in YouTube Videos
-

How to Repost Video on TikTok & How to Remove TikTok Repost
-

Improve Video Quality Online: 3 AI Video Quality Enhancers You Can't Miss
-

4K Convert to HD 1080p without Watermark: Best 4k Video Converters
-
How to Change Face in Video on Phone/Desktop/Online
-

Top 13 Birthday Video Makers with Music and Effects Free