It is not a secret that talking animation video boosts your channel. Talking avatar animations can better capture and hold the audience’s attention than static images, make your content more digestible and accessible. If you are doing a faceless YouTube channel, why not seize the trend and get more subscribers, or even revenue now?
Most blog posts and video tutorials are extremely complicated. Here in this article, we’ve broken down the talking animation creation process into 5 simple steps, with only one AI-powered video editing tool. Let’s dive in!
Can’t Miss: Best AI Video Generators You Can’t Miss in 2024 >
Method 1. Create a Talking Animation from Scratch
Step 1. Get the Tools We Need
To create a talking animation, you will need an AI cartoon image generator, AI background remover, and AI text-to-speech tool. However, FlexClip saves you from the trouble of switching between tools.
FlexClip is a powerful online video editor designed to help everyone create excellent videos. Millions of royalty-free resources and animated video templates offer shortcuts to a satisfying talking animation. The following features of FlexClip make talking avatar video creation as smooth as silk.
Step 2. Generate an Image of an AI Avatar
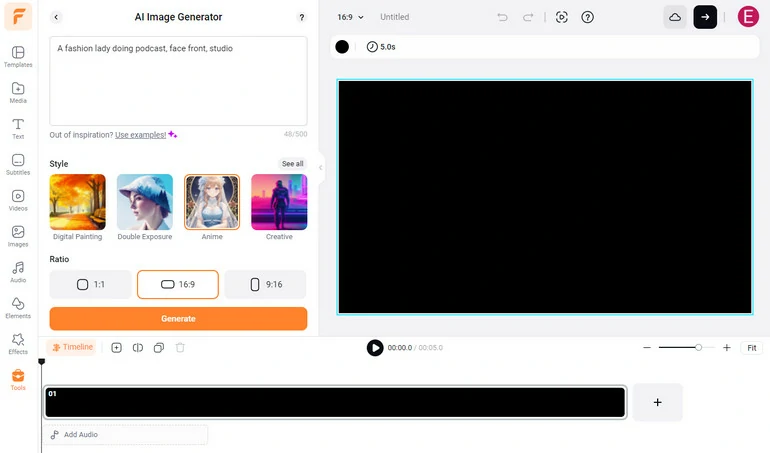
Firstly, click on the Generate an AI Avatar Image button below to access FlexClip’s AI Image Generator tool.

Enter a great prompt to generate an AI image. As for the AI avatar image, please make sure you generate an avatar facing forward without too many facial expressions. Any facial expressions could have a negative impact on the final output.
After that, select the avatar style. As for talking animation, our suggestion is to stick to the Anime or Cartoon style. However, there are other styles you can try, for instance, painting, double exposure, digital painting and so on.
Select the avatar image aspect ratio. Currently, FlexClip only allows you to generate images in 3 aspect ratios, they are 1:1, 16:9, and 9:16. Then hit Generate.
Access FlexClip's AI Image Generator
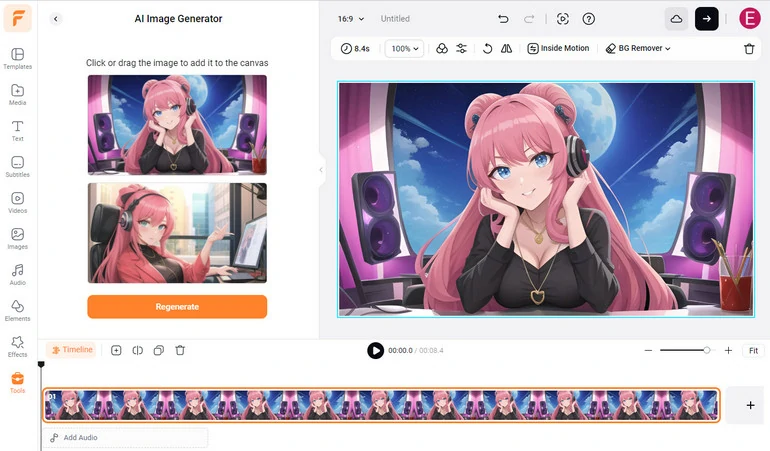
Each generation brings you 2 outputs. If you are not satisfied with the result, hit Regenerate and get 2 more. Once you find the avatar you love, click the Add as Scene button. This will add the image to the Media section and the timeline.
Generate AI Image Character
Step 3. Remove Background of the Mouth Animation
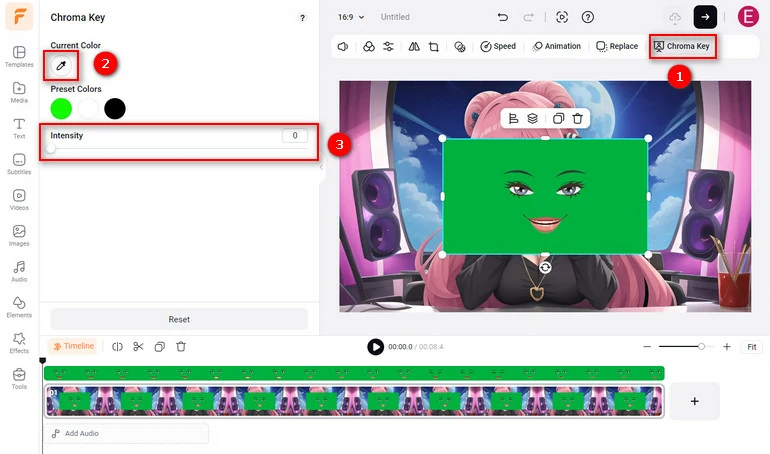
Download a mouth animation in green screen video clip from vecteezy and drag it to FlexClip’s Media section. Click the Add as Layer button to add the mouth animation to the scene.
Select the mouth animation, and then click the Chroma Key icon above the preview window. Use the color picker to select the green screen background color, then drag the slider to adjust the intensity to 100.
Remove Mouth Animation Background
Now, crop, adjust the mouth animation’s size, position so that the animation and the image merge perfectly with each other.
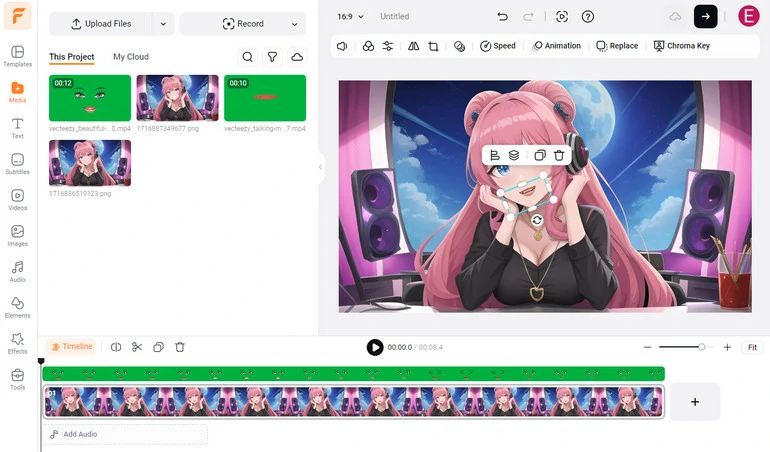
Adjust the Mouth Animation
Step 4. Do Voiceover or Generate an AI Speech
It is time to ask the AI avatar to speak something. Go to the Media section, hit Record > Record Voice, you can now add some voiceover to the talking animation.
Instead, leverage AI and let it do the voiceover task for you! Go to Tools > Text to Speech. Select a language, voice and voice style, set speed, pitch, and then enter anything you want to deliver. Hit Generate, the AI-generated speech will be added to the talking animation.
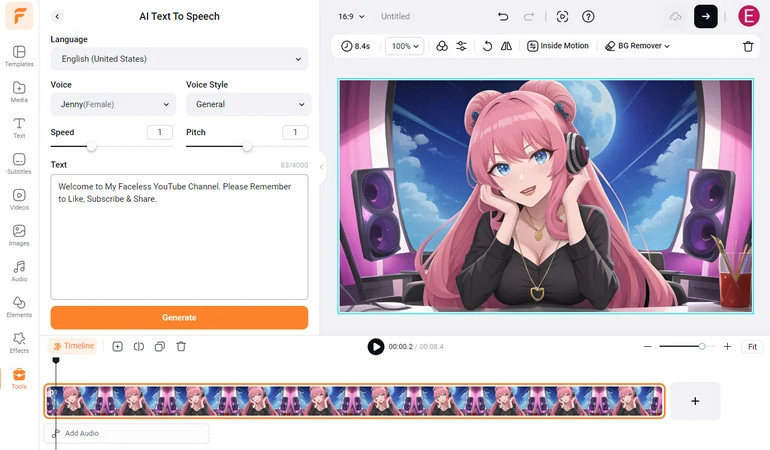
FlexClip AI Text to Speech
Step 5. Instant Share
FlexClip offers you various sharing options. You can download the video to the desktop, save to cloud services, generate a short link for your video, or directly post to social media.
Method 2. How to Make an Anime from Photo Talk
Instead of manually adding a mouse animation to an avatar photo, you can make a photo talk with natural lip movement directly using tools like HeyGen. This is a much easier and more natural way to create a talking animation.
This method comes with downsides. Firstly, the figure in the image has to be big. HeyGen may have problems dealing with photos whose main figure is small. Secondly, HeyGen is expensive. The cheapest plan costs $25 per month and you only get 15 credits, which is equal to 15 minute’s video.
The downsides don’t stop you? Follow the steps below to create an animated talking video with a photo of your own!
Step 1. Create an Avatar from Your Photo
Sign up to HeyGen and enter the creation page. Switch to Make a TalkingPhoto Video section. Click on the Upload TalkingPhoto button, follow the prompt to upload a photo of animation.
You can notice that there is a new avatar instantly added to the list. However, the avatar is round. Hover your mouse over the avatar, select Edit. Change the view mode from circle to original. After that, click the Save as New button. You now have set the whole picture as an avatar.
Step 2. Ask Avatar to Speak Anything You Like
Hover over the avatar, go to portrait mode or landscape mode. The portrait mode means vertical video, perfect for Instagram, TikTok, and the landscape mode means horizontal video, best for YouTube.
Type in anything you want the avatar to say, select the language, a voice you like. The talking animation will soon be generated. Save the video with subtitles or without subtitles.
HeyGen Talking Photo Video Tutorial
Frequently Asked Questions
1. How to make talking animation using CapCut?
CapCut is a powerful video editor, and yes, you can make talking animation using CapCut. However, you need other video editing tools. Firstly, you should use an image editor to remove the anime’s mouth first. After that, you need to remove the background of the mouth moving animation video clip and apply it to the anime photo with CapCut.
2. Can CapCut convert text to speech?
Yes, CapCut can convert text to speech. Click on any text of your CapCut project, click on the AI text-to-speech feature, select a voice you like, and you will soon get the audio.


FlexClip Video Maker
The easiest way to help you create custom videos, no design skills needed.
Start Now for Free
Hot & Trending
-
Ultimate Tik Tok Guide – How to Tik Tok & How to Make a Tik Tok Video that Gets Likes
-

Instagram Story Video Quality Bad After Upload? Fix It!
-

7 Best Ways to Find Music in YouTube Videos
-

How to Repost Video on TikTok & How to Remove TikTok Repost
-

Improve Video Quality Online: 3 AI Video Quality Enhancers You Can't Miss
-

4K Convert to HD 1080p without Watermark: Best 4k Video Converters
-
How to Change Face in Video on Phone/Desktop/Online
-

Top 13 Birthday Video Makers with Music and Effects Free