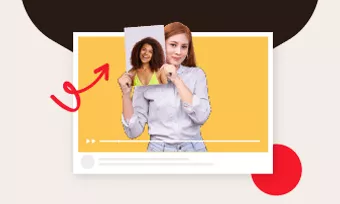
Putting text behind an image is an effect widely used in magazine covers, movie posters, promo flyers. Designers use it to quickly grasp people’s attention, add some mysterious feelings to the photos, and bring better visual experiences. Here is an example of “text behind image” effect we have created:

Example of putting text behind an image
The "text behind image effect" relies on sophisticated image background removal and picture-in-picture (PIP) techniques. Once the image background is removed, it can be overlapped on the original image and cover part of the text.
The most popular photo editing tools to put text behind an image are PhotoShop, FlexClip, and Canva. Let’s check the detailed steps.
Part 1. How to Put Text Behind Image with PhotoShop
PhotoShop is one of the most professional graphic design software where you can make all advanced image edits. It now has lots of versions, so the detailed steps may vary from each other, but are similar.
Step 1. Upload your image & Add Text
Launch PhotoShop on your computer, drag and drop your images into this program. This will create a background layer. After that, enter any text with the perfect font and color. Now, you have a text layer.
Step 2. Select the Main Object of the Image
Go to the background layer, manually select the main object of your image using lasso tool, or go to Selection > Subject. PhotoShop will use AI to detach the key object from the background.
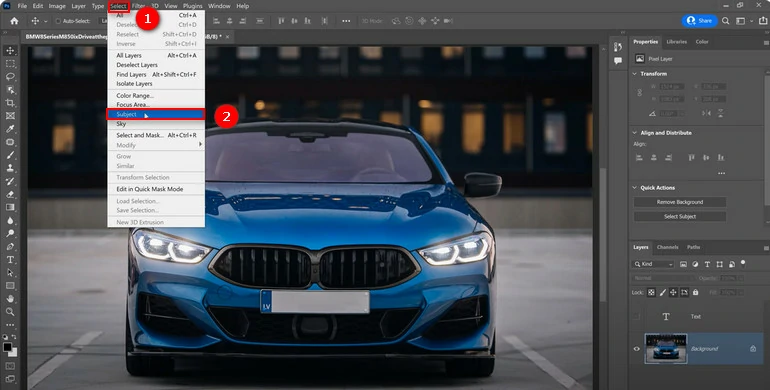
Select an Object with AI Using PS
Step 3. Fine-Tone the Selection
Press the Q key on the keyboard, you now have entered the quick mask mode. The red area indicates areas that are not selected. Select the brush tool, paint with white to reveal or paint with black to conceal certain parts of the image. Click the Q key again to bring back the selection.
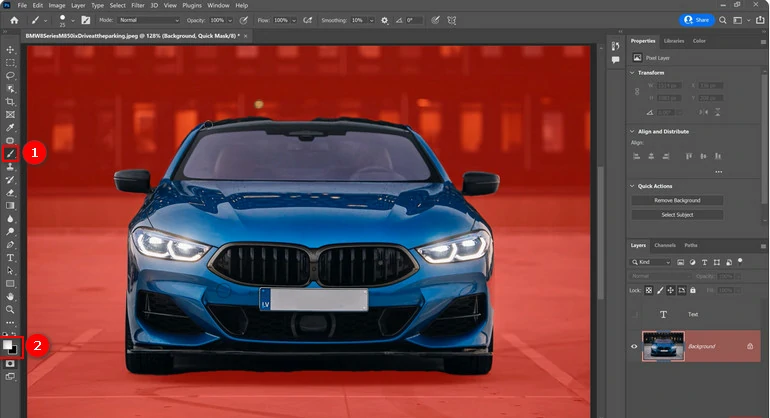
Refine the Selection
Step 4. Mask the Text
Click on Command + G on Mac, or Ctrl + G on Windows to create a group, then click on the Layer Mask to create a mask out of the selection. You can see the text showing in front of the car, but no worry, click the Invert button. The text is now shown behind the main object.
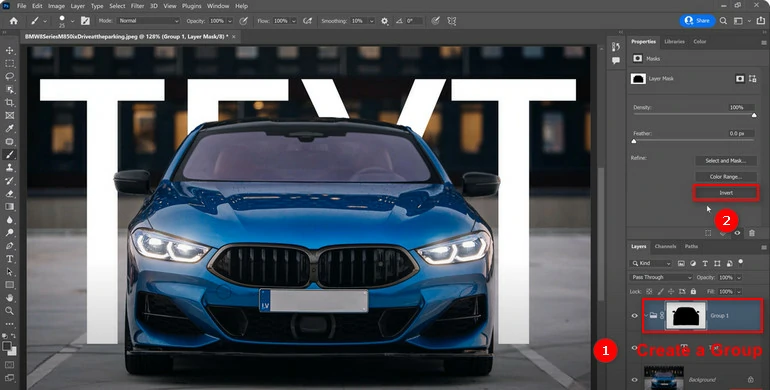
Create a Text Mask
Part 2. How to Put Text Behind Image with FlexClip
If PhotoShop is really confusing you, or you don’t want to pay anything to use this software, FlexClip lends you a helping hand. It is an online photo editing tool free for all. Most importantly, it has a simple and clean interface. Even people without any editing experience can get started quickly. Click on the Get Started Now button, upload your image and follow along.


Step 1. Upload Your Photo to FlexClip
Go to the Media section, click on the Upload Files to upload a photo from a local folder, mobile devices or cloud services. After that, click on the Add as Scene button to add the photo to the timeline.
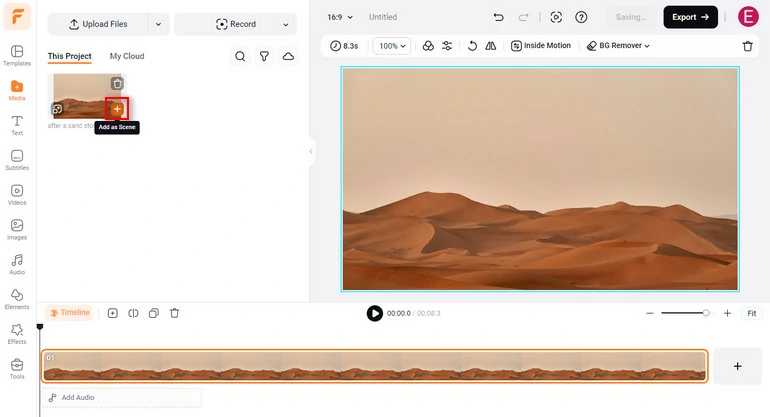
Add to the Timeline
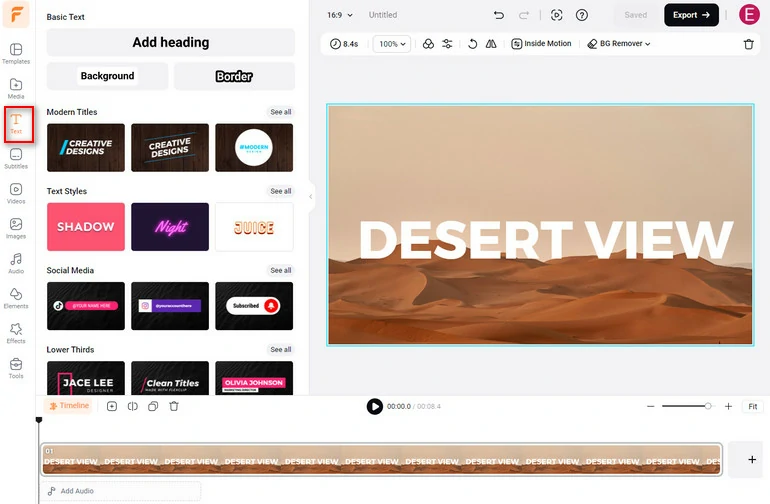
Step 2. Add Text to Your Photo
Move to the Text section, add any text you like and then customize it with the desired font, color, size, opacity, and position easily. There are also tons of professional, eye-pleasing text styles, titles saving you from lots of trouble making adjustments. Remember to give them a try!
Add Text to Photo
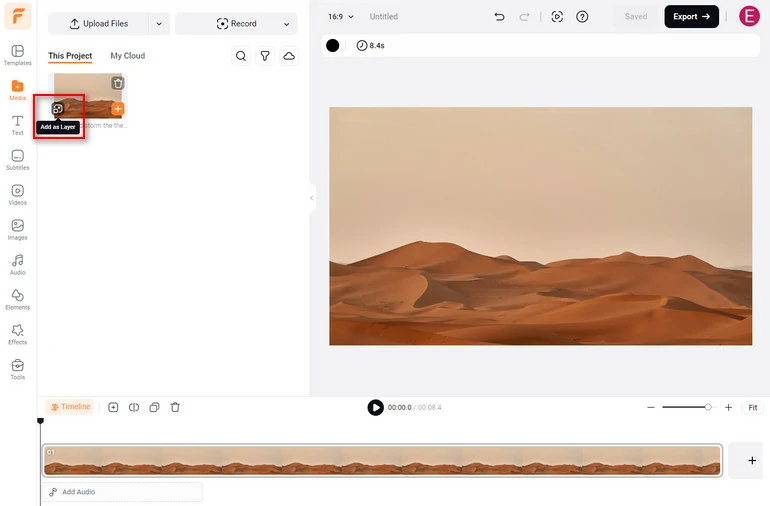
Step 3. Overlay the Text with a Transparent Image
Go back to the Media section. Click on the Add as Layer button to add the same image as the foreground.
Create a Picture in Picture Effect
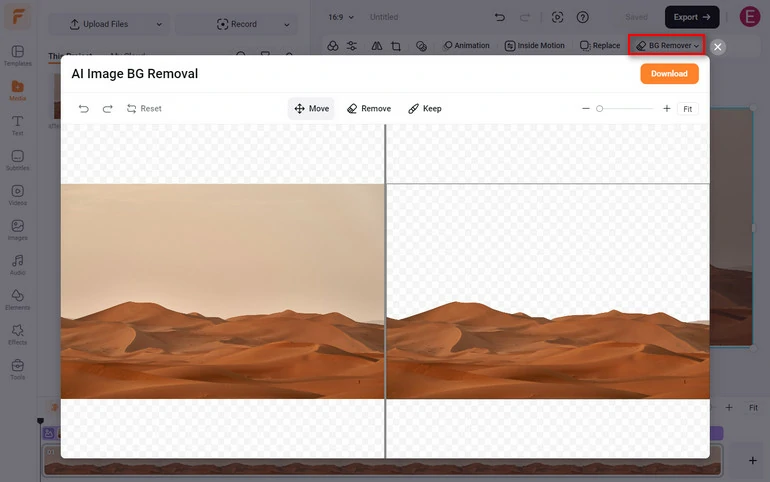
Select the image that’s above, move to the AI Image Background Removal tool to get rid of the image background. If necessary, use the brush tool to deal with the details. Adjust the transparent image’s position, size so that two images are perfectly blended with each other.
Remove Image Background
Step 4. Download
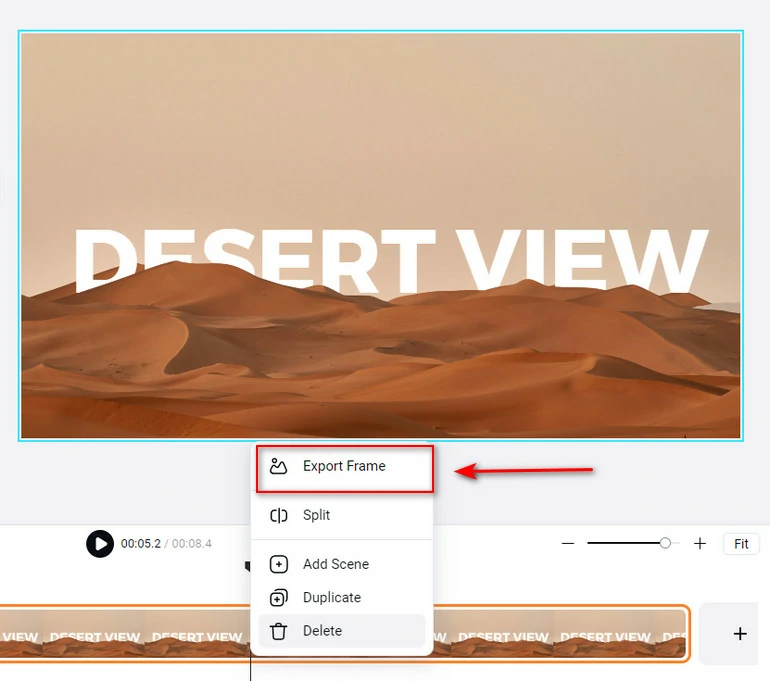
Right-click the photo on the timeline and select Export Frame. A JPG photo in up to 1080P will be saved to your computer. No watermark, no hidden charges.
Save Results
Part 3. How to Add Text Behind an Object on an Image with Canva
Canva is the last option to add text behind an image easily. Before getting started, please create a Canva account and sign in.
Here is a video tutorial about how to add text behind an object on image with Canva.
Put Text Behind An Image with Canva Video Tutorial
The Bottom Line
In this post, we have shown you 3 ways to add text behind an image with PhotoShop, Canva, and most importantly, FlexClip. They all help you in different respects.
Videos speak louder than photos, so why not create a slideshow with amazing photos you have just created? You can animate texts, add transitions, sync the photos and videos to the beat of music. Turn to FlexClip now and explore endless possibilities!


FlexClip Video Maker
The easiest way to help you create custom videos, no design skills needed.
Start Now for Free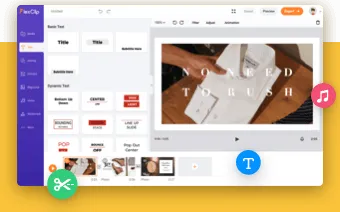
Hot & Trending
-

Ultimate Tik Tok Guide – How to Tik Tok & How to Make a Tik Tok Video that Gets Likes
-

Instagram Story Video Quality Bad After Upload? Fix It!
-

7 Best Ways to Find Music in YouTube Videos
-

How to Repost Video on TikTok & How to Remove TikTok Repost
-

Improve Video Quality Online: 3 AI Video Quality Enhancers You Can't Miss
-

4K Convert to HD 1080p without Watermark: Best 4k Video Converters
-
How to Change Face in Video on Phone/Desktop/Online
-

Top 13 Birthday Video Makers with Music and Effects Free


